Overview Link to section: Overview
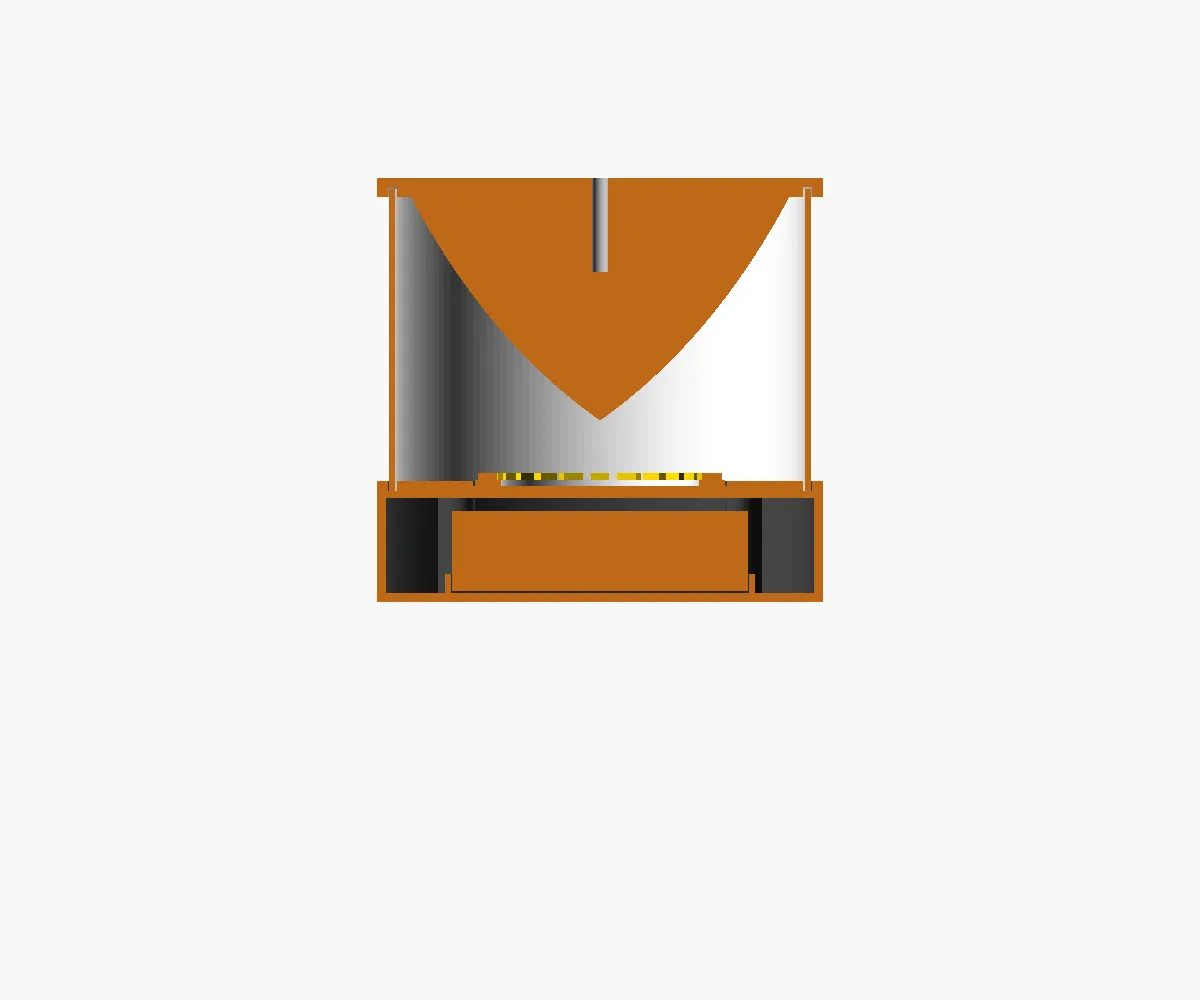
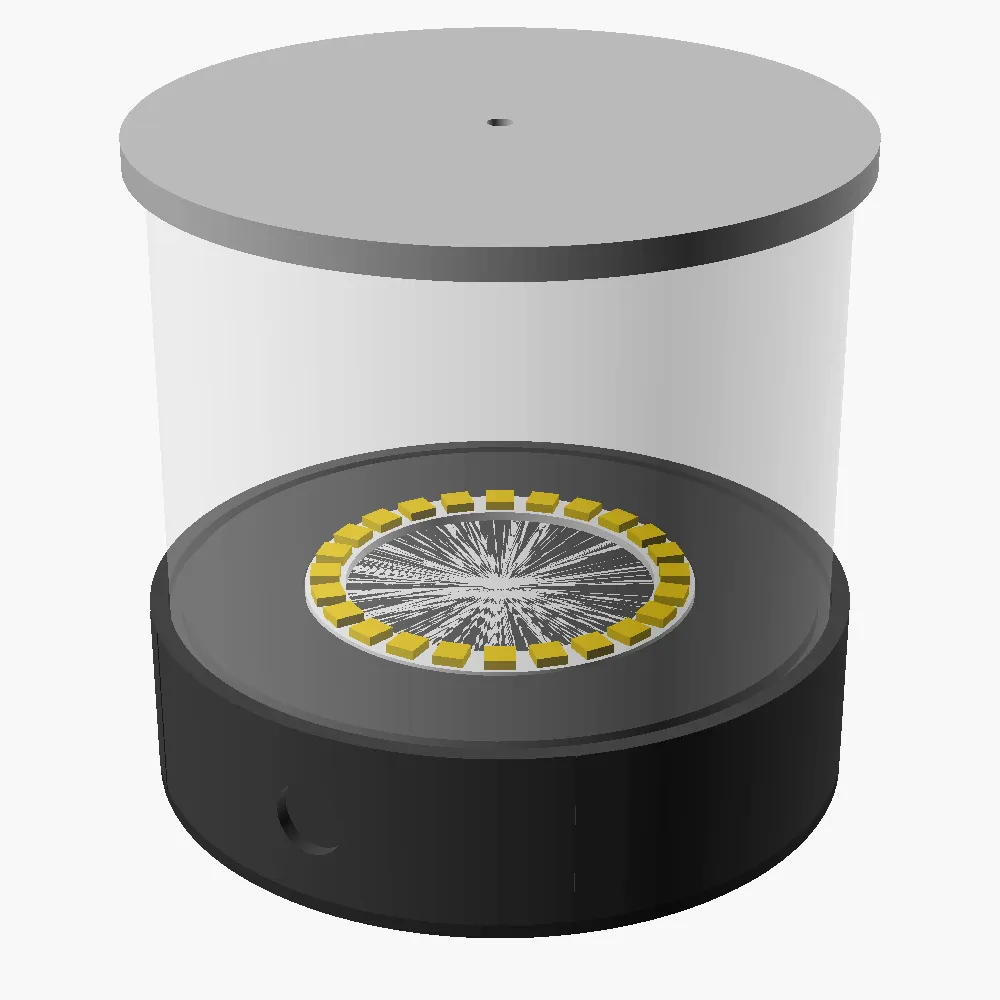
I designed a small printable lantern around a 24-LED RGBW (red, green, blue, and white) ring pointing up into a curved mirror.
The mirror redirects light around roughly 360°, from about 30° below to 50° above the horizon. The model is about 118 mm wide and 112 mm tall; the images show the repository’s assembly render and cross-section diagram.
Model and printing Link to section: Model and printing
Adjustable model and exports Link to section: Adjustable model and exports
I made the design parametric (adjustable through named dimensions and settings) in lantern.scad. Open it in OpenSCAD, a code-based 3D modeling program, using its Customizer settings panel or set part to export individual pieces.
The repository includes print-oriented STL exports (3D-printable mesh files) and raysim.py, a 2D mirror ray trace (a simulation of light paths) to rerun when changing the reflector geometry.
Print settings Link to section: Print settings
PLA and PETG are plastics commonly used in 3D printing. The parts use these settings:
- Base: PLA or PETG, top face down, without supports.
- Reflector: PLA, flange down, without supports, using 10–15% infill (the internal printed structure).
- Diffuser: clear or natural PETG, either the 1.6 mm wall tube or the vase-mode version with about a 0.8 mm line width. Vase mode prints a continuous single-wall shell.
Measure the battery holders and adjust their dimensions in the model before printing.
Mirror finish options Link to section: Mirror finish options
The mirror finish starts with sanding the curved surface from 240 to 800 grit (abrasive grades, with higher numbers giving a finer finish). The README lists these finishing options:
- Molotow Liquid Chrome over glossy black primer.
- Aluminized mylar or chrome vinyl cut into gores (tapered sections that fit a curved surface).
- Silver spray paint.
Electronics and assembly Link to section: Electronics and assembly
Parts list Link to section: Parts list
The parts list uses:
- An Adafruit 24-pixel NeoPixel RGBW ring or a compatible 66 mm SK6812/WS2812 ring. NeoPixel is Adafruit’s name for individually controllable LEDs; SK6812 and WS2812 are addressable LED families. RGBW adds a separate white channel to the red, green, and blue channels.
- An ESP32-C3 SuperMini (a small microcontroller board) running WLED (software for controlling LED lighting).
- Two 18650 cells (cylindrical rechargeable batteries) wired in parallel, called 1S2P: one series group containing two parallel cells.
- A USB-C charger with a 5 V boost converter, which raises voltage, rated for at least 2 A.
- A 12 mm latching button, which stays in its selected state after being pressed.
- A 300–470 Ω data resistor.
- A 470–1000 µF capacitor across the LED supply.
Assembly sequence Link to section: Assembly sequence
- Flash WLED (install its software) over USB first.
- Fit and hot-glue the ring into its pocket, then feed the wires through the slot.
- Fit the button and wire the charger, controller, and holders.
- Tape the holders onto the lid and close it with four M3×10 self-tapping screws.
- Press the tube into the base groove and the reflector onto the tube; a dab of glue secures them.
An optional M4 eye bolt allows hanging.
Current and estimated runtime Link to section: Current and estimated runtime
The README gives:
- Up to about 1.4 A at full white.
- A recommended 1200 mA WLED current limit.
- Roughly 6–10 hours of estimated runtime at a cozy brightness with two approximately 3000 mAh cells. Milliamp-hours (mAh) express battery charge capacity.
Related builds Link to section: Related builds
My Printed LED Sculptures use printed frames to position light along geometric shapes.
Build photos